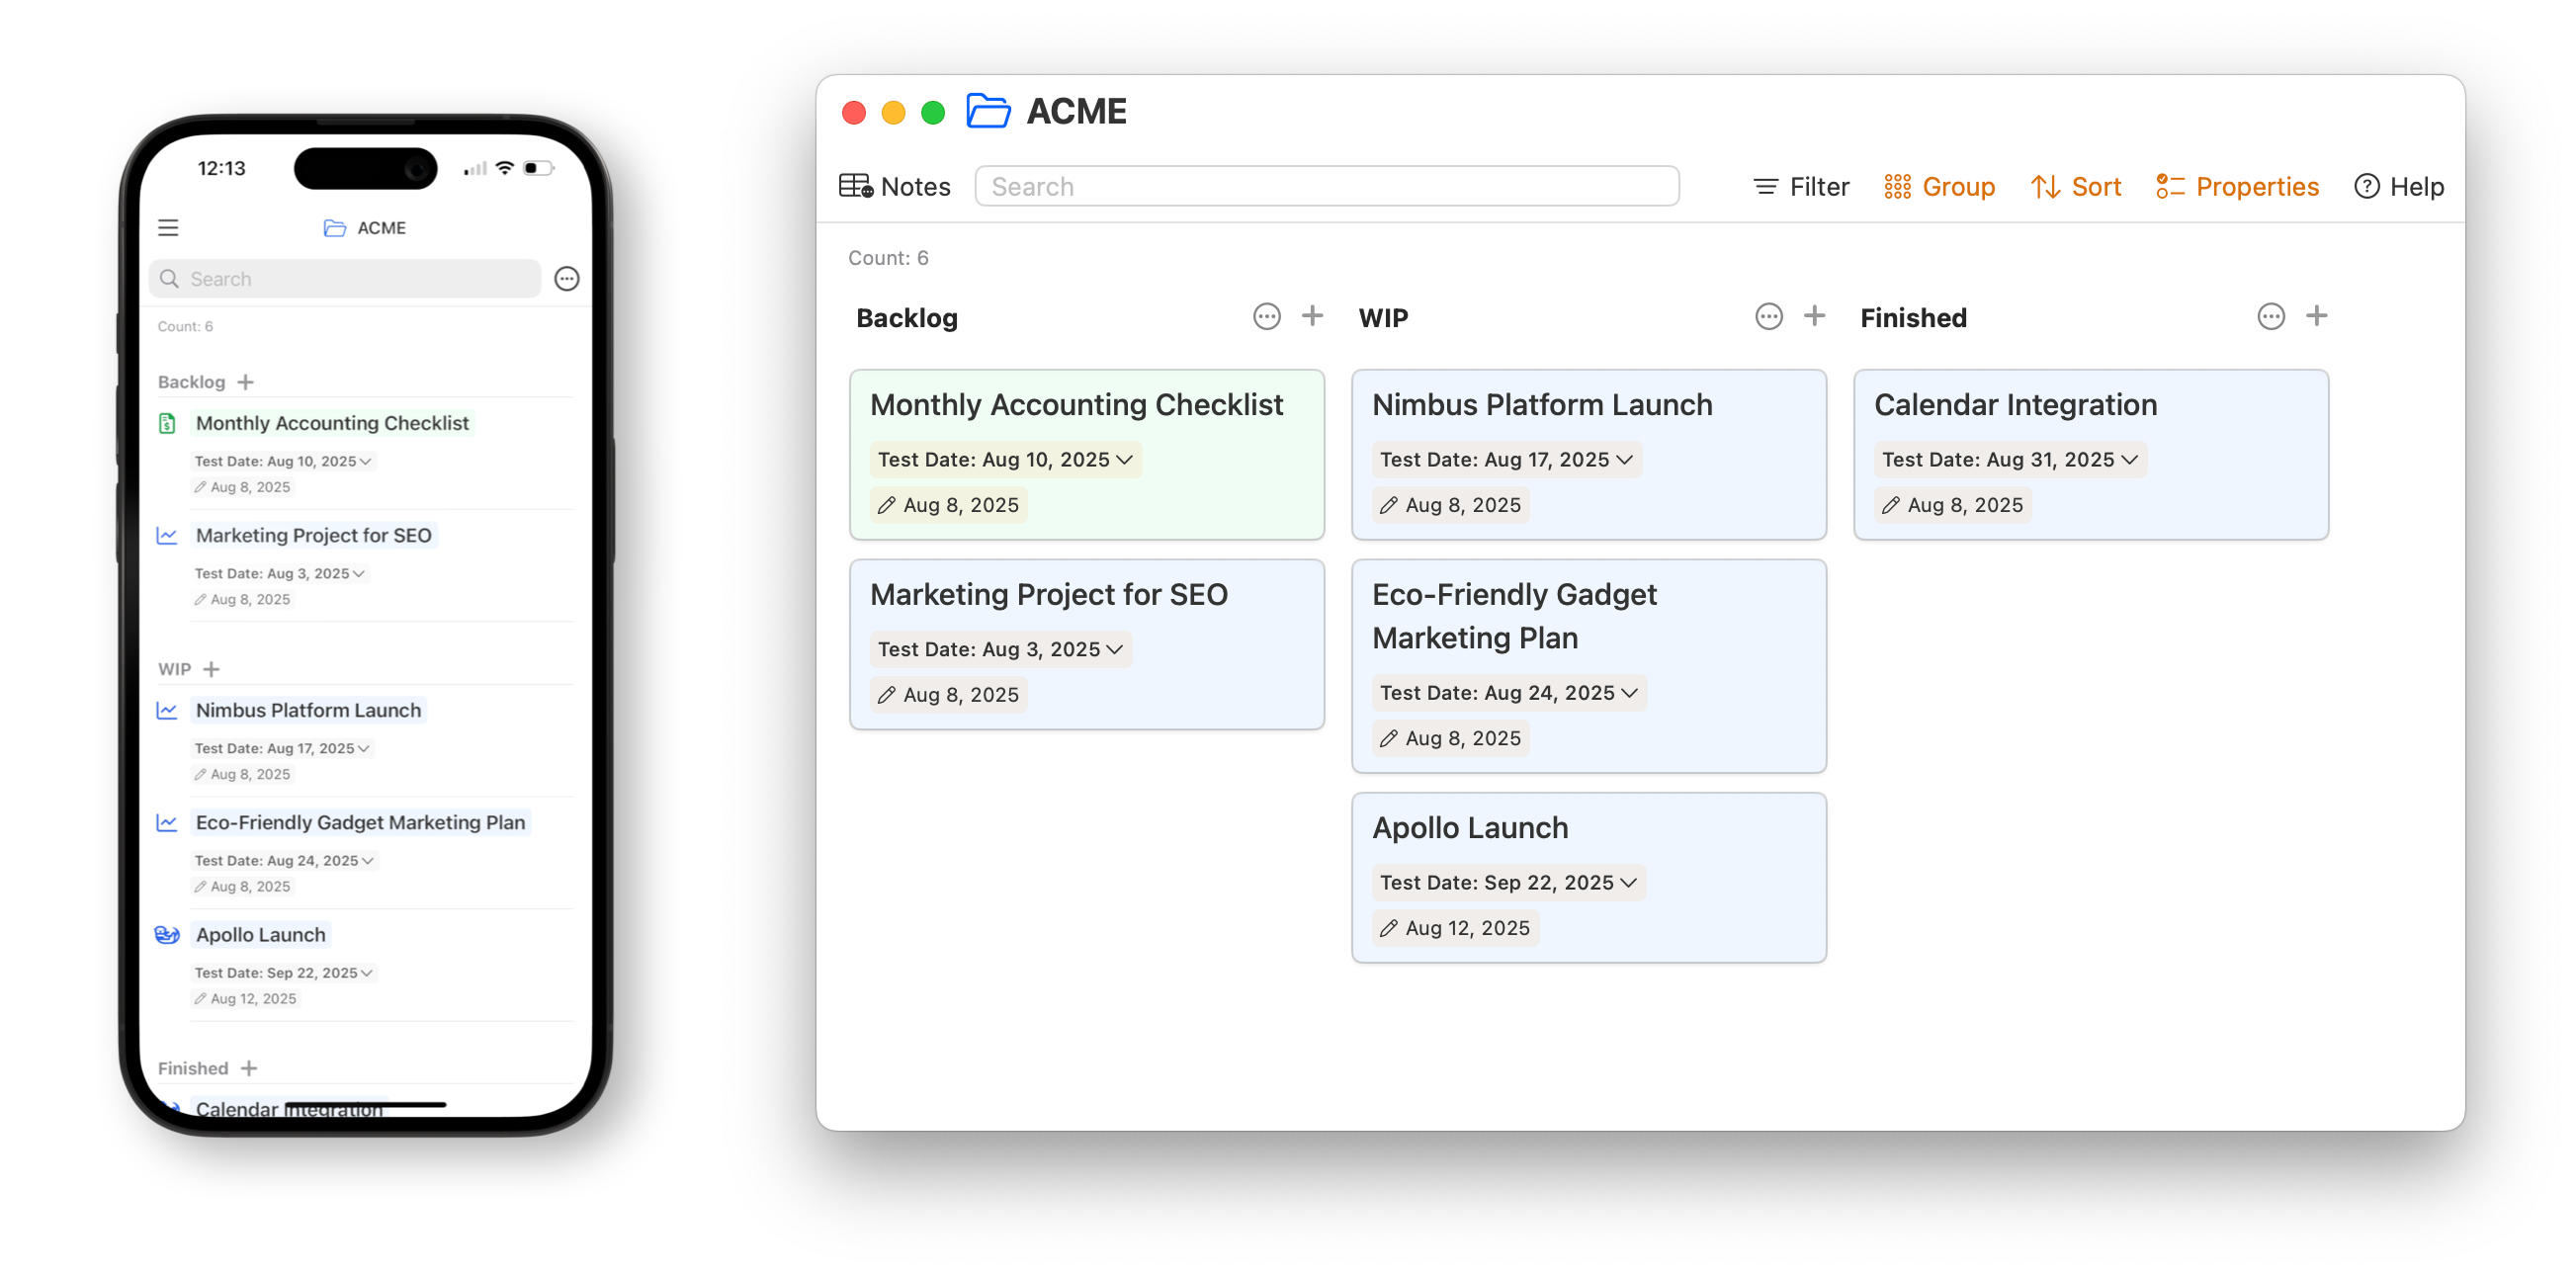
Folder Views (List & Cards)
Requirements: macOS 13+ / iOS 16+
Release notes: v3.15.2, v3.16, v3.17, v3.18
Folder Views let you see every note inside a folder (and its sub-folders) in a flexible view you can filter, group, and sort. Switch between a List or Cards (Kanban) layout, choose which fields to show, and save multiple views per folder.
🍿 Watch the overview video (a deeper dive).
Table of contents
- Quick start
- Global views from the sidebar
- Toolbar (view controls)
- Named Views (saved presets)
- Cards: customizing columns
- Changing properties inline
- Tasks: Attributed tags
- Use cases & examples
- Tips & FAQ
Quick start
- Select a folder in the sidebar (macOS or iOS). All notes in that folder and its sub-folders appear in the view.
- Choose Level: Notes for top-level notes, or Tasks to list tasks found in those notes (checklists are excluded).
- Pick a layout: List to scan fields quickly, or Cards (Kanban) to drag notes between columns.
- Show fields: Use Properties to toggle fields like Date, Folder, Tags, or custom Frontmatter keys.
- Filter / Group / Sort: Narrow down by field values, group into sections or columns, and sort however you like.
Global views from the sidebar
You can also see all notes of a type across your workspace:
- Notes: all regular notes from every folder
- Calendar Notes: all dated notes
- Teamspaces: all notes in Teamspaces
Click Notes, Calendar Notes, or Teamspaces in the sidebar to open a global Folder View you can filter, group, sort, and save like any other.
Toolbar (view controls)

Use the toolbar at the top to change layout and configure the view.
- Layout: List or Cards. In Cards, use Group to create columns by a field (e.g.,
status). - Level: Notes (top-level notes) or Tasks (tasks inside those notes; checklists excluded).
- Properties: Toggle which fields appear (Date, Folder, Tags, or custom Frontmatter like
priority,assignee,status). - Group: Group notes by Folder, Tag, Date, or any Frontmatter field. In Cards, this defines your board columns.
- Filter: Choose one or more fields to filter by and select their values (e.g., Type = Book Note). Combine multiple filters as needed.
- Sort (+ Asc/Desc): Sort by default fields or a custom Frontmatter field. When you drag cards in a grouped Cards view, an
orderfield is added automatically to preserve your manual order.
Where is the toolbar on iOS? It’s a compact menu button at the top-right, next to search.
Named Views (saved presets)

Create multiple saved views for the same folder — for example, a Kanban grouped by status, another grouped by assignee, and a filtered list for just tasks.
Open a folder and click the View icon in the top-left to rename the current view or create a new one. Changes are saved automatically and sync to all devices.
Saved views are stored at Filters/folder.views (YAML). You can edit that file directly if needed.
🎥 Watch the intro to Named Views
Cards: customizing columns
When viewing Cards and using Group, you can fully control the columns from the column header menu (the button to the right of a column title):
- Insert Column Before/After to add new columns anywhere
- Move Left/Right to rearrange columns—no need to prefix column names with numbers
- Rename columns inline
Empty columns stay visible even after you move all items out, and you can create brand-new columns without needing existing notes or tasks to “seed” them first. Build your ideal board structure, then add content as needed.
Changing properties inline
You can change a note’s properties directly in the list or on a card. Click a value to switch it. If only one option appears, add more values to other notes first — the view learns available values from the notes it shows.

Tasks: Attributed tags
Add attributes to tags to surface task metadata in views. For example: #todo(state: backlog) or #todo(state: doing, assigned: Eduard). These attributes appear as fields you can group, filter, and sort by — especially useful in Cards/Kanban.
🎥 See examples at this timestamp.
Overwrite task icons
You can set icon, icon-color, and icon-style (same names/values as note properties) so tasks display with custom icons in List and Cards.
Example: #todo(icon: lightbulb) or #todo(icon: lightbulb, icon-style: solid, icon-color: green-600). To browse icon names, use the note properties panel at the top of a note.
Use cases & examples
- Reading & research: Tag notes with
type: bookortype: article; use Group bytype; filter byauthorortopic. - Project management: Use
status(Backlog → Doing → Done) and switch to Cards for a Kanban board. - Planning by week: Add a
weekvalue like W01-2025 and group by it to get a simple timeline. - Teamspaces: Group by
assigneeor filter bypriorityto review shared work at a glance.
More examples in this video.
Tips & FAQ
- iOS folder tap: Tapping a folder opens its view. To expand the folder tree, tap the chevron ▸ on the right.
- Checklists vs tasks: The Tasks level shows tasks; checklists aren’t included.
- Manual card order: Dragging cards in a grouped Cards view writes an
orderfield so your custom order is preserved. - Frontmatter: Add custom fields in your notes’ Frontmatter to unlock powerful filtering, grouping, and sorting. See Note Properties.